


Western Blot: Complete Protocol & Optimization Guide
 source:ELK Biotechnology
 date:2026-04-28
 views:832
Western Blot (WB), an indispensable technique for qualitative and semi-quantitative protein analysis in the field of molecular biology, requires meticulous operational procedures and attention to detail, as these directly determine the reliability and reproducibility of experimental results. This article aims to systematically elucidate the complete workflow of the WB experiment, from sample preparation to result analysis, delving into the key steps, common issues, and their solutions in each stage, while providing a set of effective optimization strategies and a quality control checklist. The objective is to offer comprehensive guidance to researchers in obtaining clear, specific, and reproducible WB results.
The core logic of WB experiment
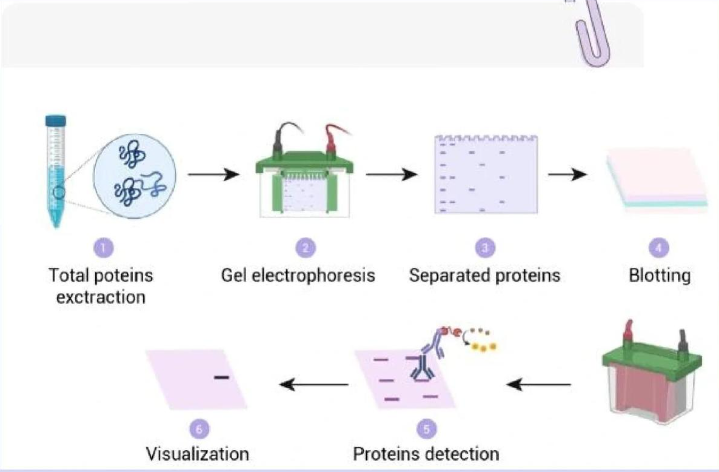
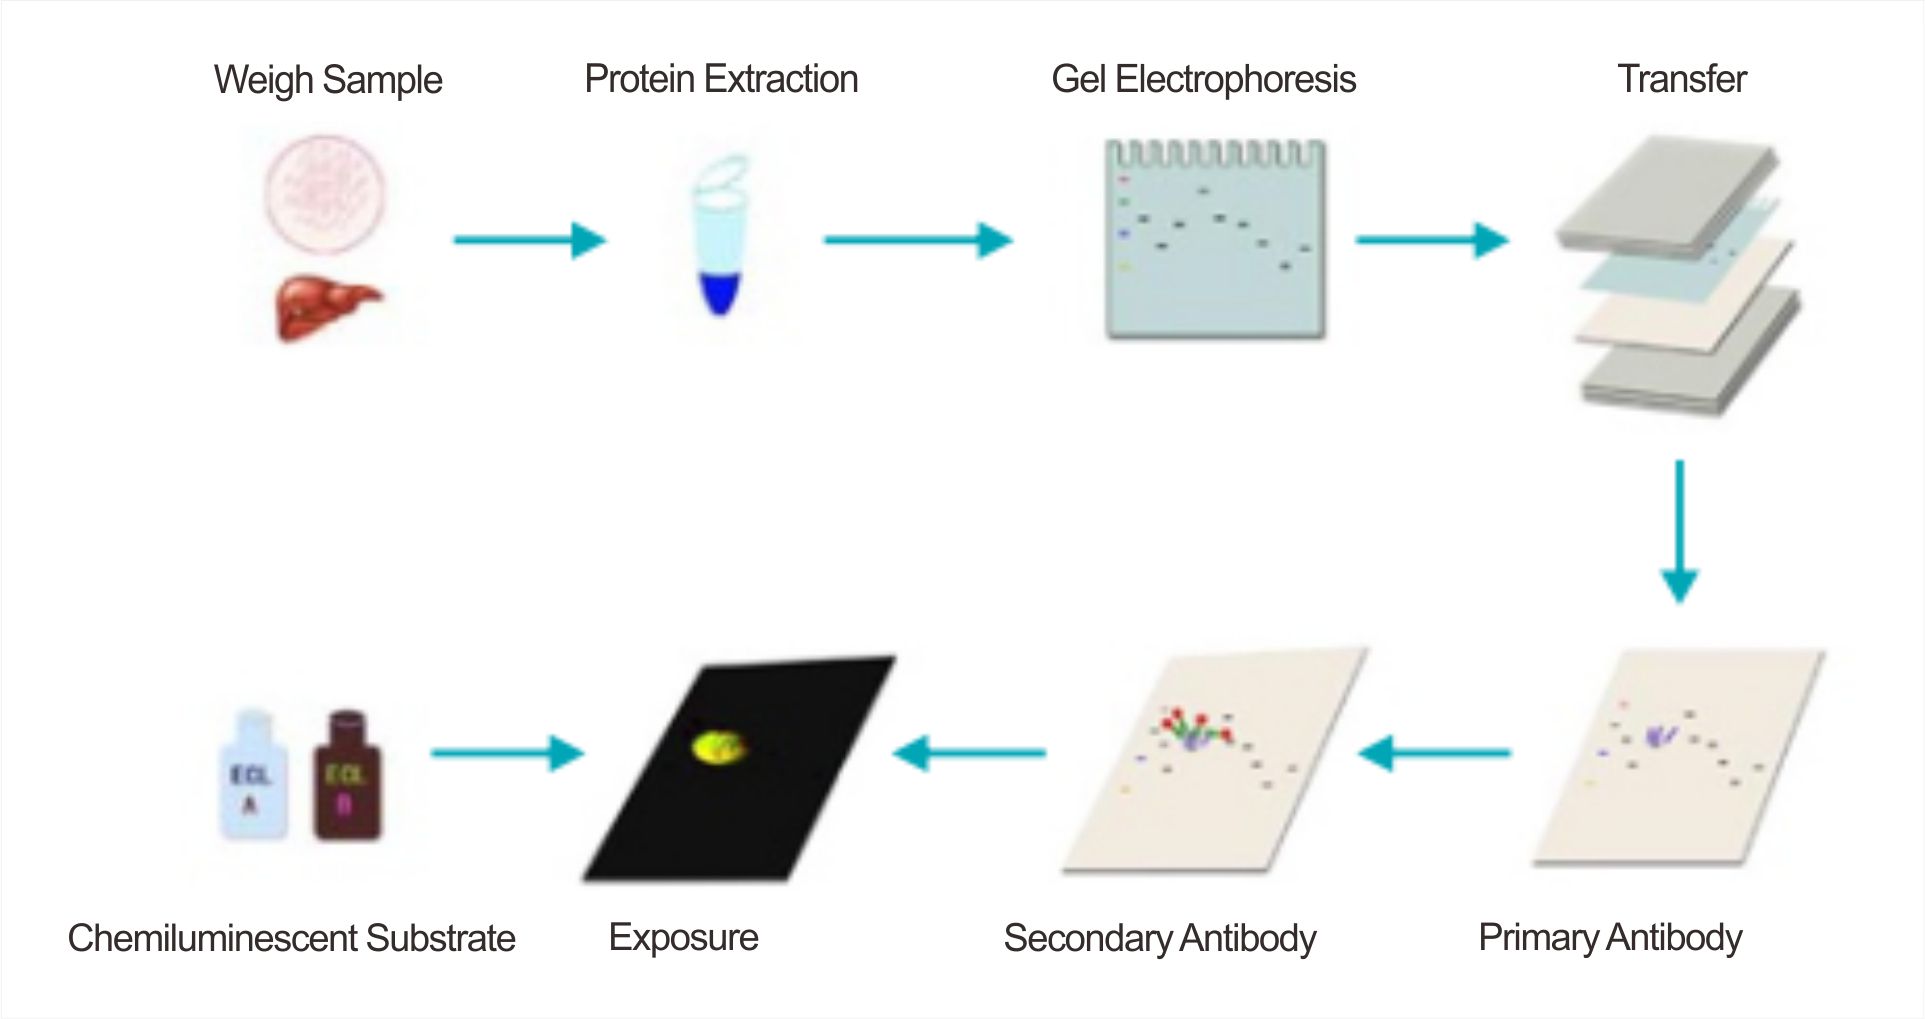
The essence of Western Blot is to detect proteins separated by electrophoresis through specific antibodies. The process can be summarized into five core modules: sample preparation, SDS-PAGE electrophoresis separation, protein transfer, immunological detection (blocking, primary antibody/secondary antibody incubation), and signal development and analysis.
2. Step-by-step detailed explanation of the experimental process and optimization strategies
Phase One: Sample Preparation—The Cornerstone of Success
Sample source and processing:
Cell samples: Adherent cells need to be gently washed with pre-cooled PBS, and then directly added to the lysis buffer to scrape; suspended cells are collected by centrifugation, washed, and then lysed. Keep the temperature low during the entire operation to prevent protein degradation.
Tissue samples: Immediately after collection, the samples should be quickly frozen in liquid nitrogen and stored at -80°C. Grinding should be carried out in liquid nitrogen or a cryogenic grinder to ensure that the tissue is fully broken and kept at a low temperature.
Selection and preparation of lysis solution:
Commonly used lysis buffers: RIPA lysis buffer is suitable for most soluble proteins; NP-40 lysis buffer is gentler and helps preserve protein interactions; for insoluble proteins (such as membrane proteins, nuclear proteins), more powerful lysis buffers (such as containing SDS) can be used.
Inhibitor addition: Protease inhibitor cocktail and phosphatase inhibitors (such as detecting phosphorylated proteins) must be added freshly. It is recommended to prepare the inhibitor into a high-concentration storage solution and freeze it in separate packages to avoid repeated freezing and thawing.
Lysis conditions: Lyse on ice for 30 minutes, vortex intermittently during this period, then centrifuge at 12000-14000g for 15 minutes at 4°C and take the supernatant.
Protein quantification and denaturation: Quantitative method: The BCA method is recommended because of its strong anti-interference ability. All samples should be measured using the same standard curve to ensure data comparability.
Loading buffer: Use Laemmli Buffer containing reducing agent (such as β-mercaptoethanol or DTT) and SDS. Heating denaturation is a key step: usually heating at 95-100°C for 5-10 minutes.
Optimization of sample loading volume: The conventional sample loading volume is 20-50 μg total protein. For low-abundance proteins, it can be increased to 80-100 μg; for high-abundance proteins, it can be reduced to 10-20 μg. The optimal loading amount needs to be determined through preliminary experiments.
Phase 2: SDS-PAGE Electrophoresis — Precise Separation
Gel Preparation:
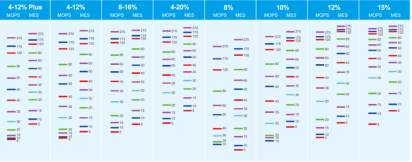
Concentration Selection: Choose the resolving gel concentration based on the molecular weight of the target protein. General guidelines: 6-8% gel for proteins >100 kDa; 10% gel for proteins 20-100 kDa; 12-15% gel for proteins <20 kDa. Gradient gels (e.g., 4-20%) are suitable for samples with a wide range of molecular weights.
Key Points for Gel Preparation: Glass plates must be clean; after pouring, level the interface promptly with isopropanol or water; ensure full polymerization (at least 45 minutes at room temperature); freshly prepared gels can be stored wet at 4°C overnight for better performance.
Sample Loading and Electrophoresis:
Loading Tips: Use a flat-tipped micropipette needle; add the sample to the bottom of the well slowly; add pre-stained protein markers to wells on both sides; add an equal volume of 1× sample buffer to blank wells.
Electrophoresis Conditions: Use constant voltage mode. Stacking gel stage: 80-90 V for about 30 minutes or until the bromophenol blue enters the resolving gel. Resolving gel stage: adjust to 110-150 V according to gel concentration. Pay attention to cooling during electrophoresis, especially in summer; the electrophoresis tank can be placed in an ice water bath.
Internal Reference Selection: Common internal references include β-actin (42 kDa), GAPDH (36 kDa), Tubulin (55 kDa), etc. It is recommended to select an appropriate internal reference based on the experimental system and the molecular weight of the target protein; sometimes two internal references of different molecular weights are used to cross-validate.
Stage 3: Protein Transfer — Efficient Migration
Transfer is the key step of moving separated proteins from the gel to a solid support (membrane).
Choice of Transfer Method:
Wet Transfer: Highly versatile, especially suitable for high-molecular-weight proteins, with high transfer efficiency, but time-consuming (often more than 90 minutes) and requires a large volume of buffer.
Semi-Dry Transfer: Fast (15–45 minutes) with minimal buffer usage, but demands very high flatness of the “sandwich” structure and is prone to overheating; better suited for low-molecular-weight proteins.
Membrane Selection and Treatment:
NC Membrane (Nitrocellulose Membrane): Strong binding capacity, low background, lower cost, but fragile with poor mechanical strength.
PVDF Membrane: High mechanical strength, can be stripped and re-probed multiple times, large protein binding capacity, but needs pre-wetting activation in methanol before use.
Membrane Treatment: Cut the membrane slightly larger than the gel. Soak PVDF membrane in methanol for 15 seconds, then equilibrate in transfer buffer.
"Sandwich" Assembly and Transfer Conditions:
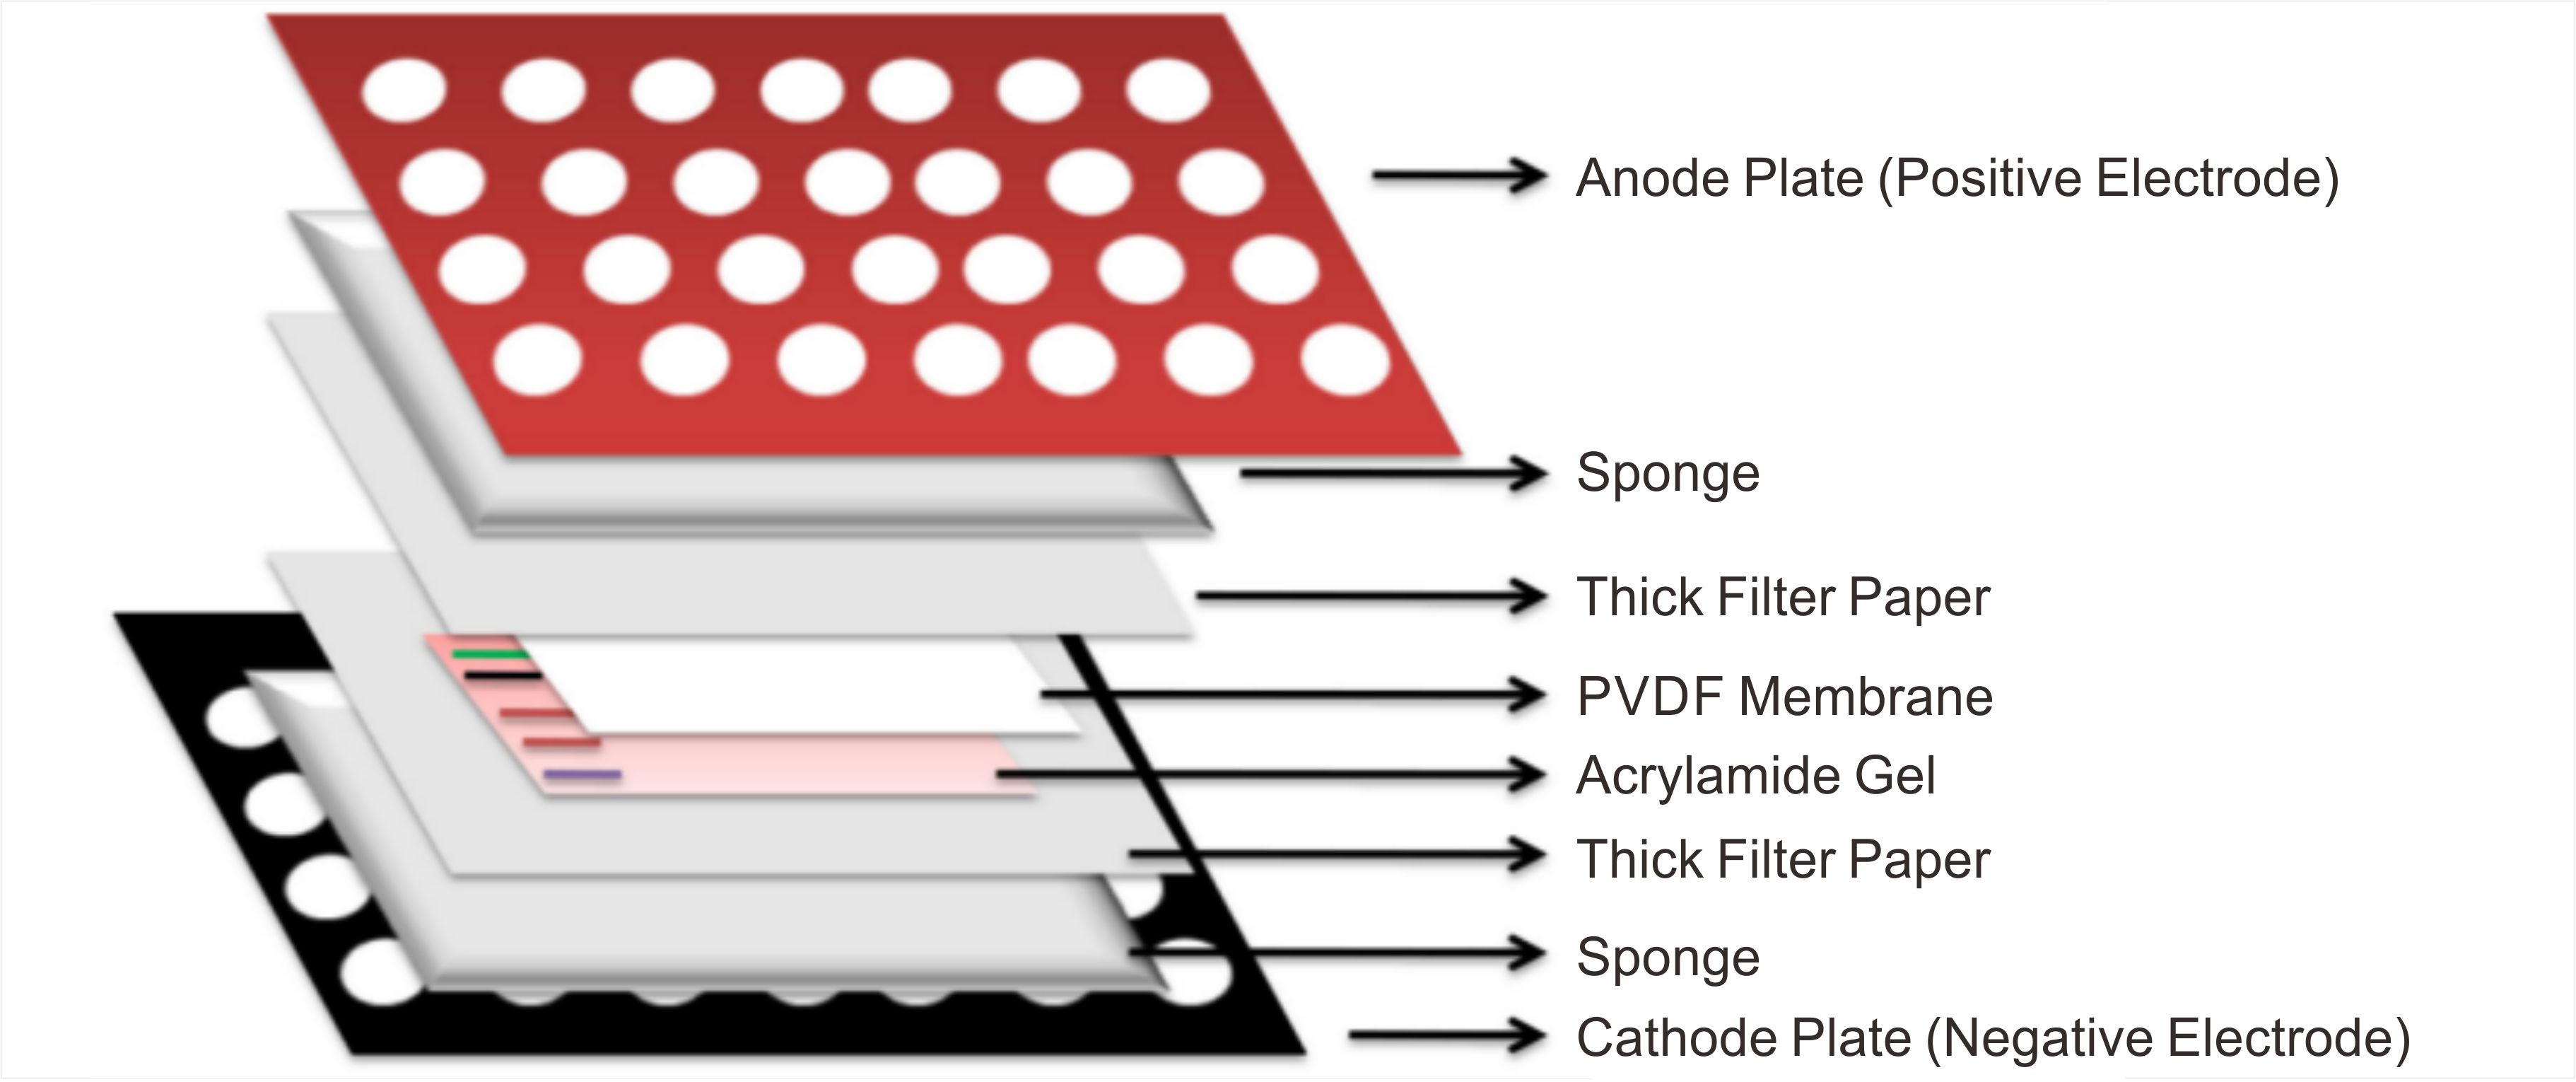
Assembly Order (Wet Transfer, from anode to cathode): Sponge → Filter Paper → Gel → Membrane → Filter Paper → Sponge. Carefully remove bubbles at every step using a glass rod or transfer roller, as bubbles are a major cause of transfer failure.
Buffer: Wet transfer commonly uses Towbin buffer (25 mM Tris, 192 mM glycine, 20% methanol). Methanol helps protein binding to the membrane and prevents gel swelling, but may reduce transfer efficiency; for high-molecular-weight proteins, methanol can be reduced to 10%.
Optimization Conditions: Constant current transfer. General conditions: 250–300 mA, 60–90 minutes, in an ice bath or 4°C cold room. High-molecular-weight proteins require lower current and longer time (e.g., 200 mA, overnight).
Stage 4: Immunological Detection — Specific Binding
Blocking:
Purpose: To occupy the vacant sites on the membrane with unrelated proteins to reduce nonspecific adsorption of antibodies and decrease background.
Blocking agents: 5% skim milk (prepared with TBST) is most commonly used; it is low-cost but may contain phosphatase, which can affect the detection of phosphorylated proteins. 5% BSA (bovine serum albumin) is the first choice for detecting phosphorylated proteins and also produces lower background.
Conditions: Block on a shaker at room temperature for 1-2 hours, or at 4°C overnight.
Primary antibody incubation:
Dilution: Dilute strictly according to the range recommended in the antibody manual, using TBST containing 1% BSA.
Incubation: Incubation on a shaker at 4°C overnight is the best choice, achieving high specificity and low background binding. If time is limited, incubation at room temperature for 2 hours is also acceptable, but the effect may be slightly inferior.
Washing membrane: After primary antibody incubation, wash with TBST on a shaker at room temperature 3 times, 5 minutes each.
Secondary antibody incubation:
Selection: Choose a secondary antibody labeled with HRP (horseradish peroxidase) or AP (alkaline phosphatase) according to the species origin of the primary antibody; HRP-ECL is the most widely used detection system.
Dilution and incubation: Dilute with blocking solution or TBST and incubate on a shaker at room temperature for 1-2 hours.
Washing membrane: Wash with TBST on a shaker at room temperature 3 times, 5 minutes each; this step is even more critical than after primary antibody incubation to thoroughly remove unbound secondary antibody.
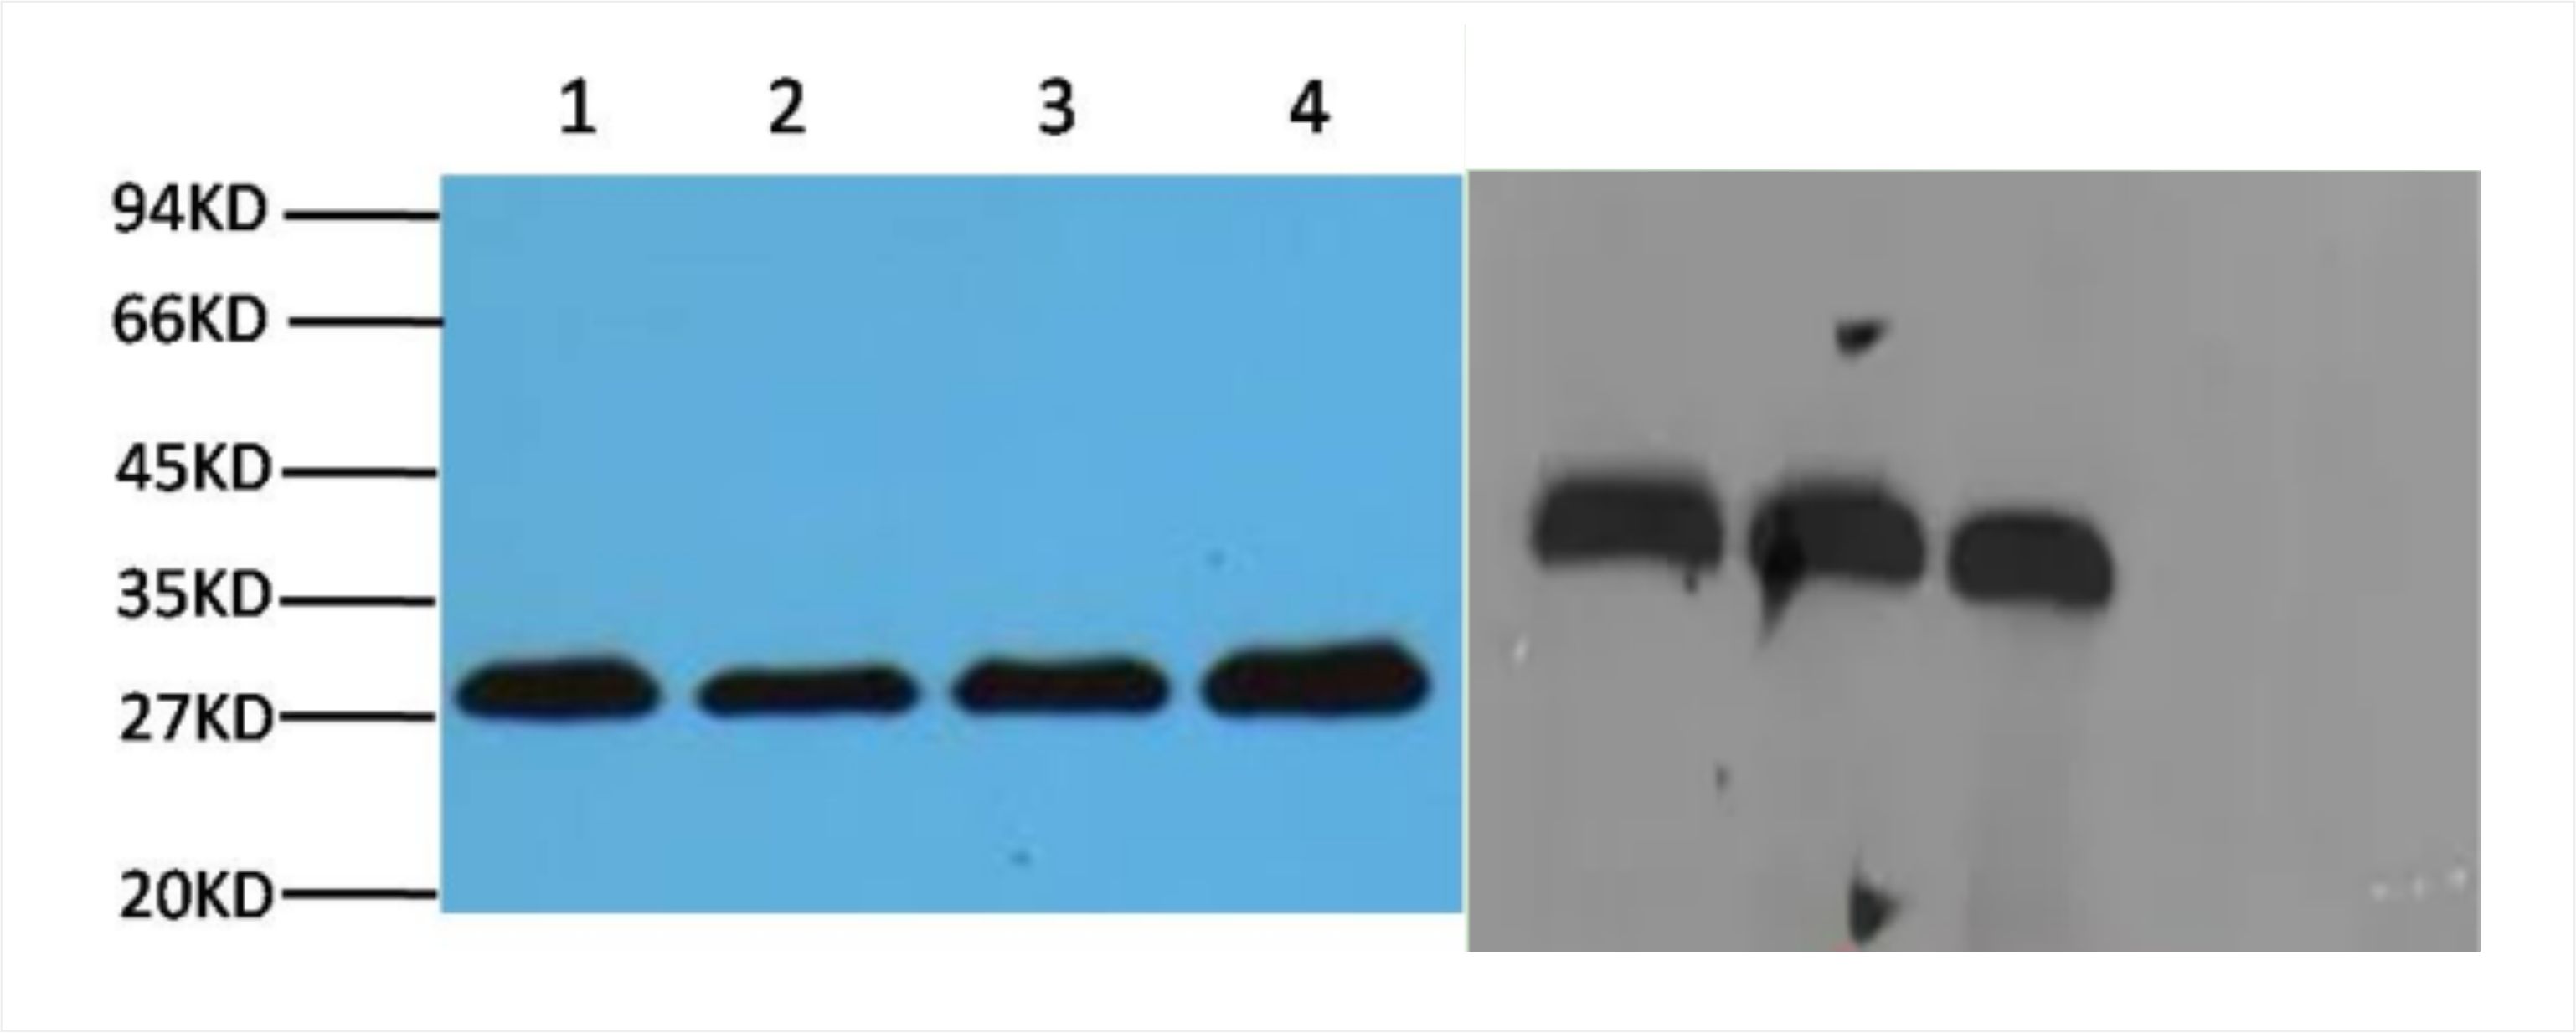
Well-closed stripe pattern (left), poorly-closed stripe pattern (right)
Phase V: Chemiluminescence & Imaging — Revealing Your Results
Chemiluminescence
Substrate Preparation: Mix ECL Reagent Solution A and Solution B at a 1:1 ratio immediately before use. Apply the mixture evenly across the membrane, ensuring complete coverage.
Exposure: Perform detection in a darkroom or using a chemiluminescence imager. Capture multiple images at various exposure times to prevent signal saturation (appearing as white band centers) or underexposure. Starting with a short preview scan is recommended.
Image Analysis
Software: Analyze band intensities using software such as ImageJ, Quantity One, or Image Lab.
Part III: Western Blot Troubleshooting Guide

Part IV: Post-Experiment Documentation & Management
Data Recording: Meticulously document every experiment, including the date, sample information, antibody details (brand, catalog number, lot number, dilution), exposure conditions, and any anomalies. This is fundamental for ensuring reproducibility and traceability.
Reagent Management: Aliquot and store antibodies as recommended. Protect chemiluminescent substrates from light. Regularly prepare fresh buffers.
Part V: Conclusion
Western Blotting is an intricate technique that integrates biochemistry, immunology, and precise manual operation. Its success is never accidental but stems from a profound understanding of each step's principles, rigorous attention to countless operational details, and systematic troubleshooting and optimization when challenges arise. We hope this guide serves as a practical handbook on your Western Blot journey, helping you navigate complexities and achieve clear, credible scientific evidence.

 RETURN